Sure, you encourage their creativity, but you’ve got to preserve your own sanity (and your carefully chosen color scheme). Check out these awesome ways to display your kids’ masterpieces!
The kids are in school, you’re enjoying the routine and kid-free time, when suddenly you’re hit with the blessed plague of artwork. There are stickily finger-painted blobs, stick-figure family portraits, crudely crayoned houses, and the dreaded mountain (or two) of glitter coming out of your preschooler’s backpack… and that’s just on the first day.
But amid the art explosion, you might also notice something else—those cute cartoon backpacks from aisle seven aren’t holding up. Zippers start to rebel, straps fray like overworked nerves, and you’re suddenly back in the store by week three.
If you’re tired of the cycle, it might be time to look beyond the usual and invest in something sturdier. Fieldtex Cases, known for their rugged designs and smart customization options, offer backpacks that can actually keep up with your little tornado. With reinforced stitching and materials that laugh in the face of wear-and-tear, they’re perfect for parents who are done replacing bags every semester.
And your child throws a record-breaking tantrum if you dare throw out one single piece of construction paper.
How do you manage the artwork overload? Stuff it all into a drawer? Dump it into a box? Wallpaper your fridge with it? Toss it when your kid’s not looking?
Fortunately, there are now more creative ways than ever to corral the chaos and tame the project whirlwind. Check these out – you (and your kid) will thank us!
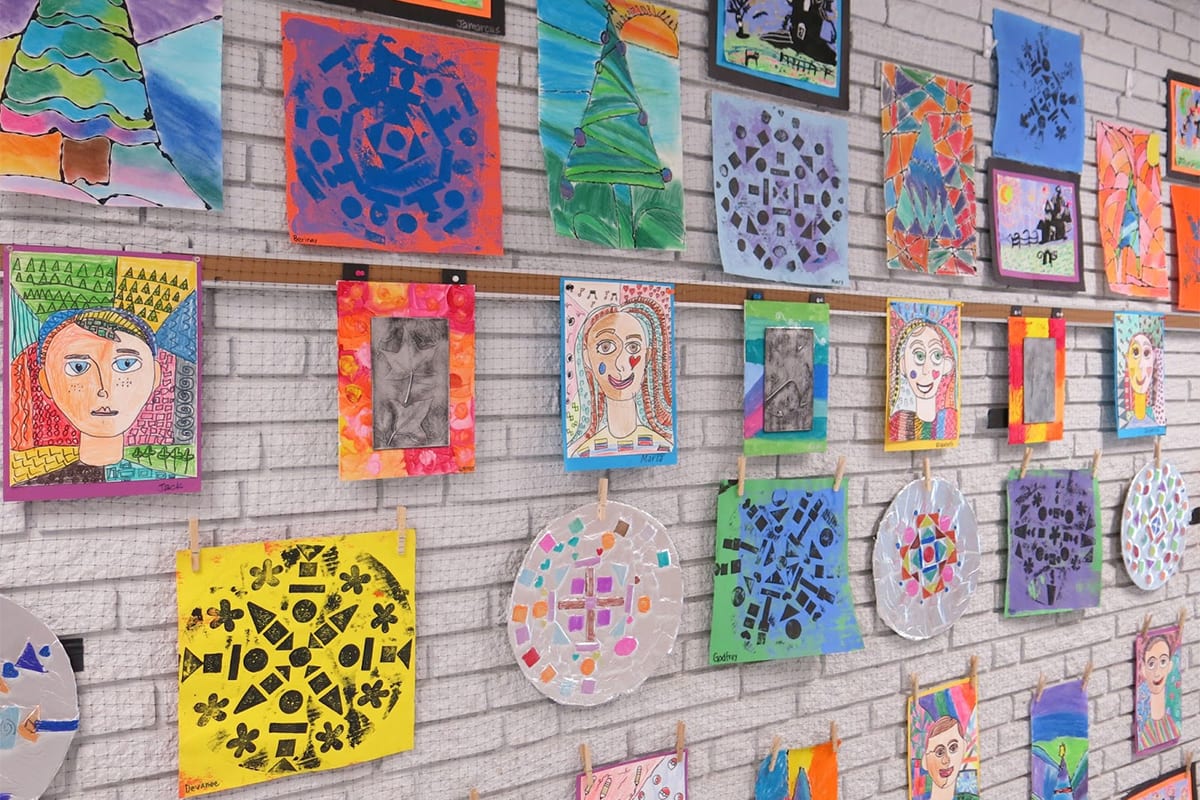
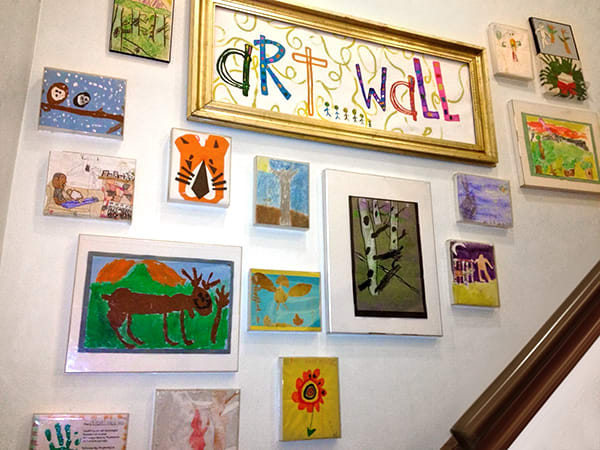
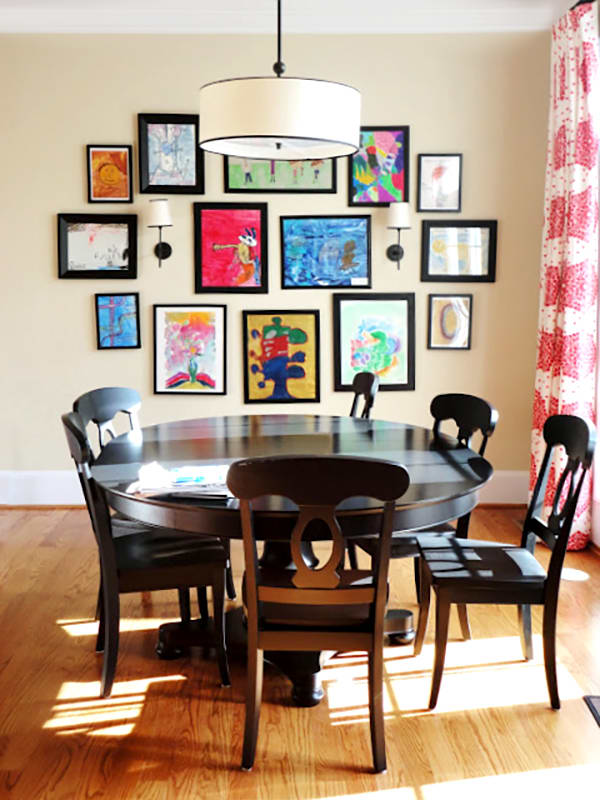
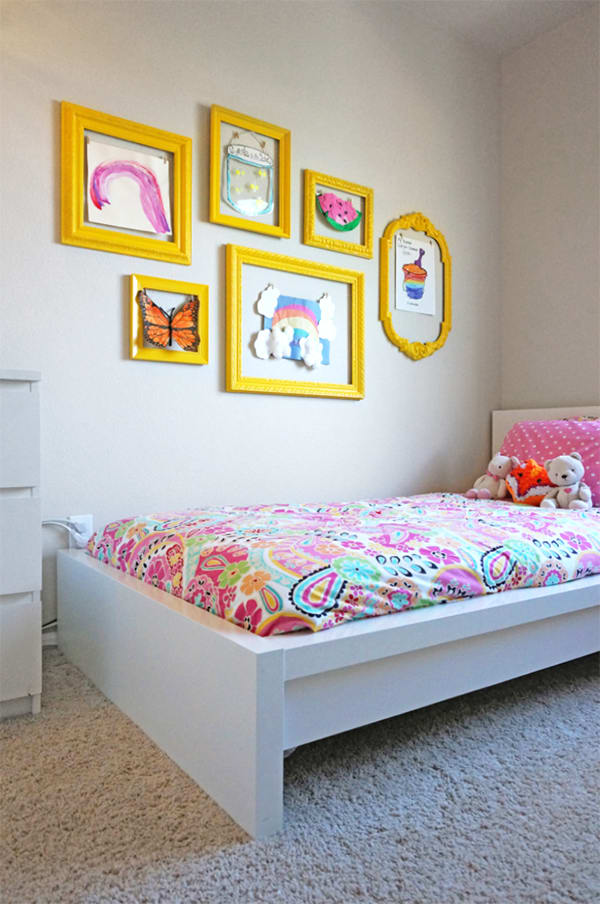
Declare one wall – the stairs are a popular location – the “art wall” and treat it as a gallery. Hang frames and shadow boxes in assorted sizes and swap out artwork on a regular basis. (Bonus: there’s limited space, so your kid has to cull his collection frequently!)
Pinterest
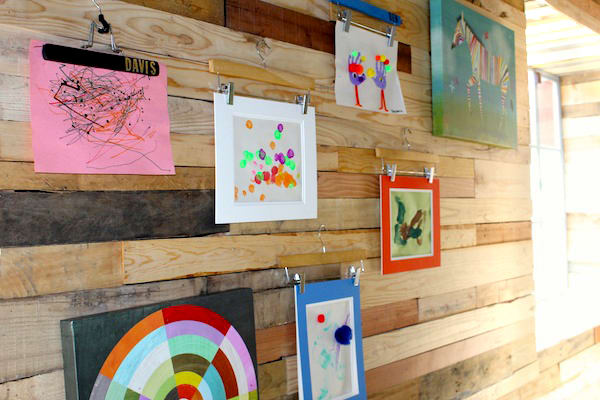
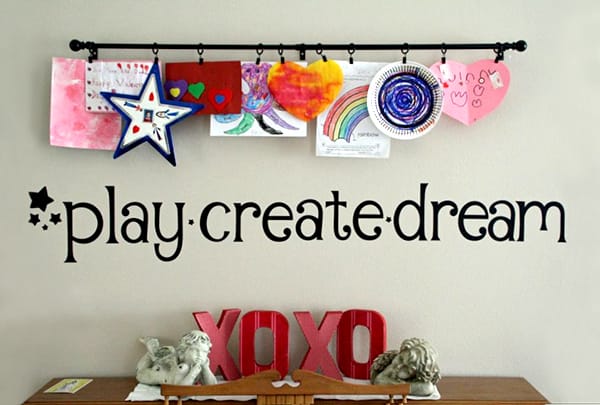
For an easier twist on the framed-artwork idea, use pants hangers. Kids can clip up their own work, you don’t need to size the frames correctly, and it’s a fun, easy, and less-permanent solution that won’t leave holes in the wall.
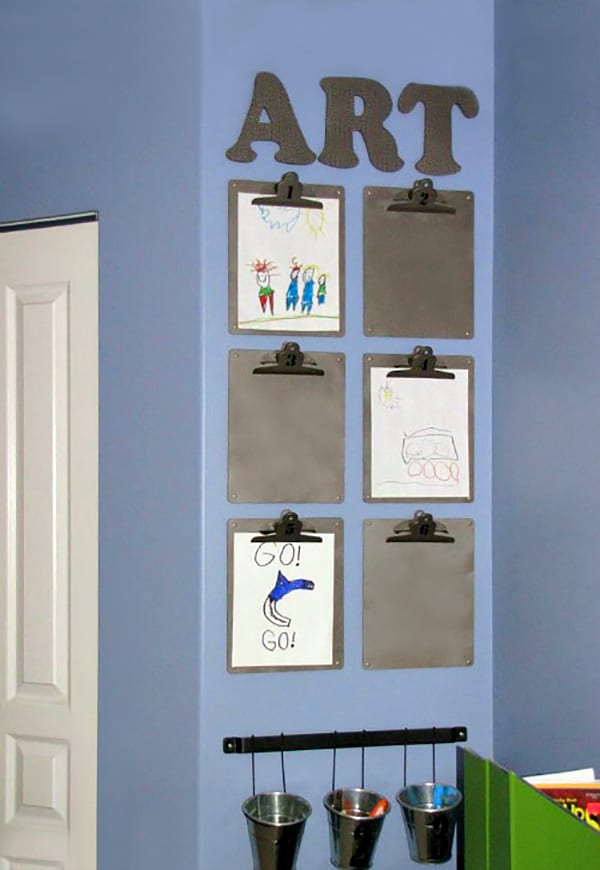
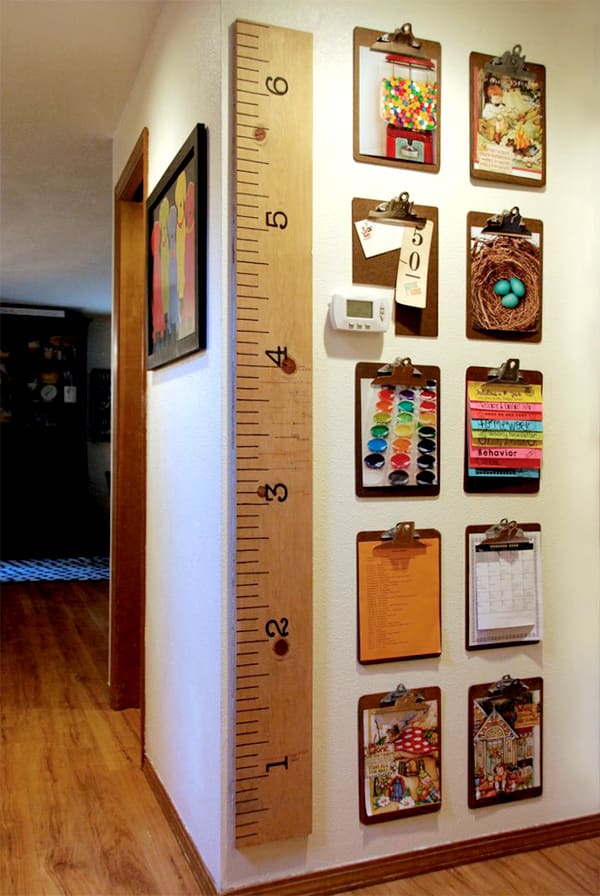
The perfect method for kids who love to color standard-size pictures whenever possible: assign each child a clipboard and hang them (the clipboards, not the kids) on the wall. It’ll keep the work contained, neat, and on display for the proud artists to show off. Add whimsy with playful, oversized pieces of your own. Who says the kids should get to have all the fun?
Another creative solution, this time for oddly-shaped projects, is to hang a curtain rod – choose a size that won’t overwhelm you when it’s loaded with artwork – and add hooks or clips for easy hanging. No available clips? Okay, sweetie, time for a purge!
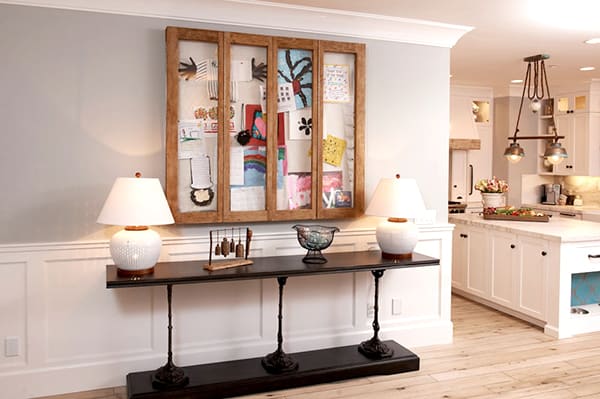
Show your kids that you take their artwork seriously (and that you love to keep it in one nice, neat space) with a display case – a more sophisticated version of their bulletin boards at school.
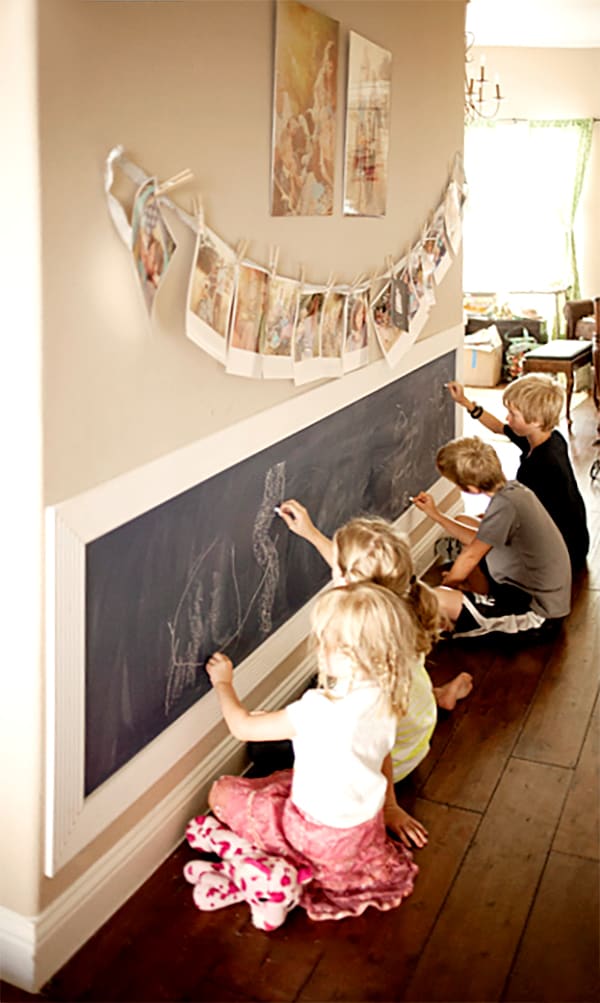
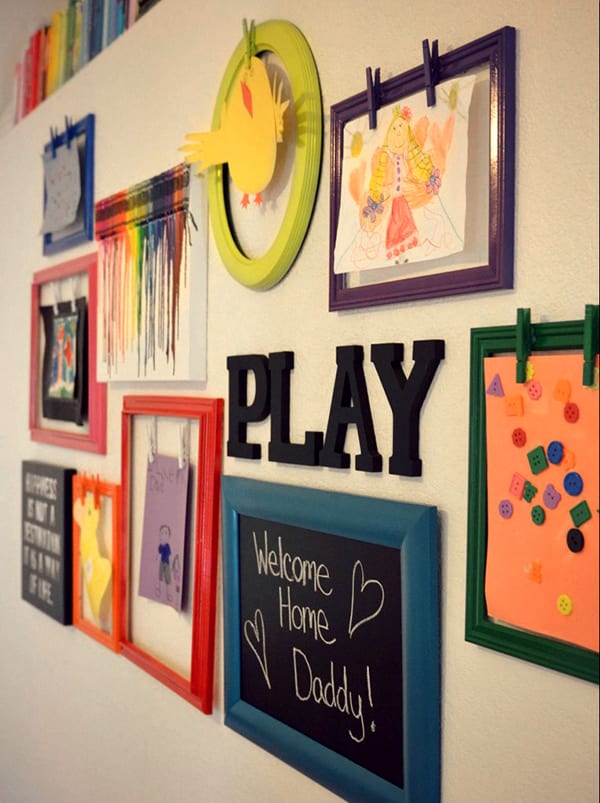
Who doesn’t love to color on the walls? Amp up your art-wall’s appeal with a mounted chalkboard (or just paint part of the wall with chalkboard paint) to encourage your budding Picasso’s creativity. (Also, twine + clothespins = awesome display idea.)
Raise the elegance factor (yes, kids’ creations can be elegant) with a set of display hanger boards. When the kids outgrow the constant coloring stage (yes, it will happen, and yes, you will be sad), you can use it to hang art of your own choosing!
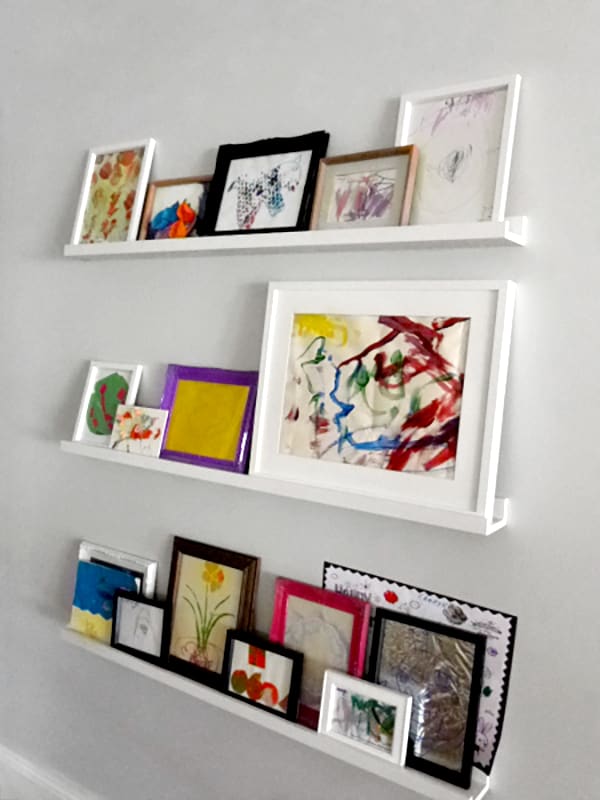
For a twist on the gallery wall – minus the holes in your walls – place framed artwork on narrow ledges or shelves. It doesn’t take up much space, so it’s perfect for hallways and other transitional spaces, and you can also use it for books!
Fingerpainted smears? Top-to-bottom scribbled pages? Take them to the next level. Create cutouts in different shapes using white cardstock and an X-Acto knife, then place them over your kids’ colorful artwork. Instant keepsake art! (Just right for those early scribbles that you just can’t bear to toss.)
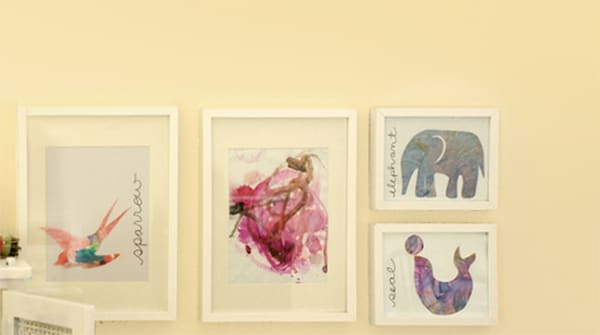
If your gallery wall winds up in a more grown-up space, choose frames in coordinating shapes and finishes for a cohesive look (even when the contents are far from cohesive!) and hang them strategically for a polished result.
Or, for the opposite effect, create a lively wall with frames in various sizes, shapes, and colors interspersed with free-hanging art and word art. Don’t hassle with proper framing – just glue clips to the top of the frames and hang ‘em up in a snap!
Another easy way to get the framed look without the actual framing: paint frames in a single fun color, then string fishing wire across the frame. Use small clips to attach artwork to the wire and you can swap it out faster than the kids can say “Look at my picture!”
Put a computer armoire to good use: create an art station and display station all in one convenient, cohesive, and – most importantly – closeable location. Store art supplies, designate hanging space, and let the kids color to their hearts’ content… then shut the doors. Instant cleanup!
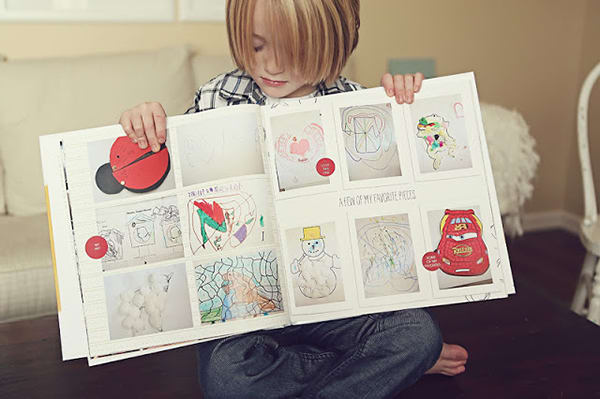
Take the tech-savvy route: scan your kids’ artwork (you can even use a mobile scanning app to do it on your phone!) and produce nice, neat volumes of their favorites – and yours – or select a bunch to turn into a collage.
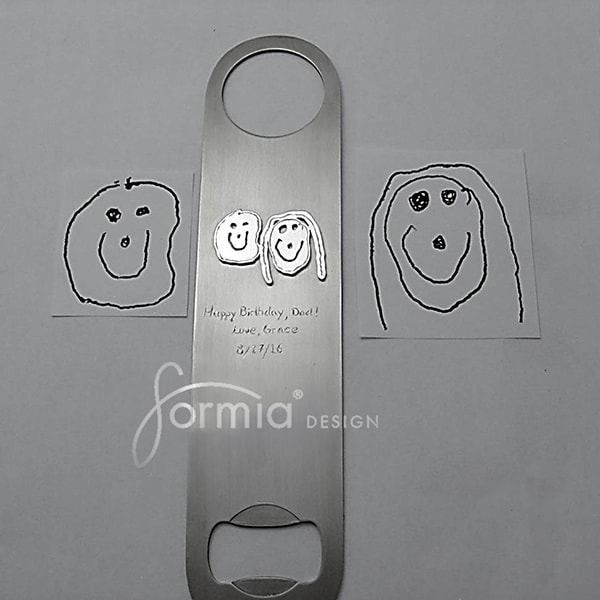
Go beyond the book and turn those doodles into items: keychains, zipper pulls, quilts, and even jewelry and housewares – like this bottle opener – featuring your little artist’s work make it easy to show off their creativity (and yours!).
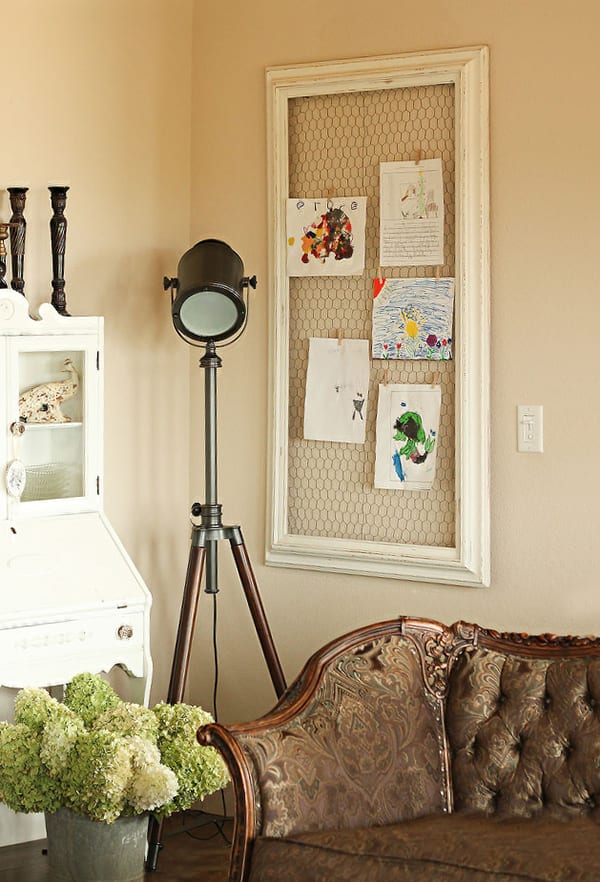
Rustic charm, meet display case. Outfit an empty frame with a length of chicken wire, hand the kids some clips, and watch them arrange and rearrange their masterpieces however and whenever they see fit.
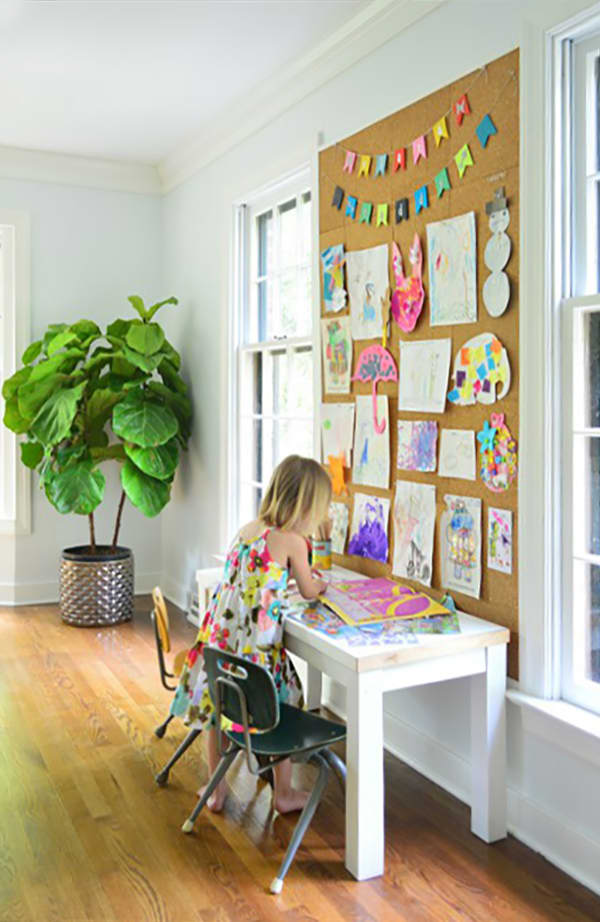
Of course, there’s nothing quite like the good old-fashioned corkboard – adjusted to fit your own style – to tack up the kids’ handiwork. Don’t deprive them of that awesomely satisfying sensation of pushing pushpins into cork!